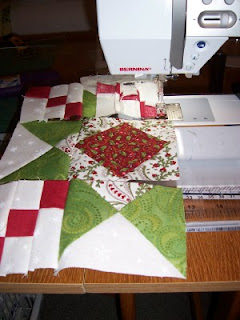
I have 12 star blocks finished; 8 more to go!
Here is a tutorial I put together (with lots of photos!) to show you how to make this star block. It is a variation on the Ohio Star.
First, you need four fabric squares, each cut 5.5" square. Two green squares for the star points, one square cut from your background fabric, and one square from the light contrast fabric.
Additionally, you need the center red square, cut 4.5" square, four 2.5" squares cut from the light contrast fabric, twelve 1.5" squares from red fabric, eight 1.5" squares from background fabric, and eight rectangles, 1.5" by 2.5" from the background fabric.
I found that laying all the pieces out on a
block board helps tremendously with organization and keeping track of the steps. I have six of these boards so can cut and work on several blocks at one time.
We'll make the center square-in-a-square first. If you have another construction method for this that you like, by all means use it. Just be sure the final piece comes out 4.5" square (4" finished size).
You need a marking pencil and ruler. I like the
Sewline mechanical pencils; they seem pricey but the lead lasts a long time and doesn't break.
Use the pencil and ruler to draw a line diagonally across each 2.5" square of contrast. This will be your
sewing line. This construction technique is sometimes called "corner flip."
Place a small light contrast square in the corner of your red center square. Sew across the corner on the line you drew.
Repeat with another contrast square on the opposite corner.
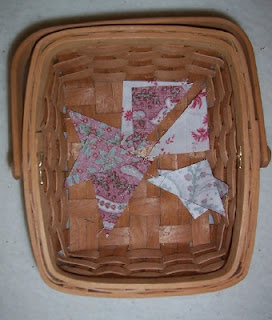
Using a ruler and rotary cutter, or pair of scissors if easier for you, trim off the corner a quarter inch from the stitched line. I know some quilters think this method is wasteful but I think it is justfied by the accuracy. However, I have been stitching the cut-off triangles into triangle squares and tossing them into this basket for some as yet undetermined future use.
Press your seams to one side or open (I like to press them open to reduce bulk); the result will look like this.
Repeat with the two remaining light contrast squares on the other corners. Your final square-in-a-square will look like this. It should measure 4.5" on each side.
Next, we'll make the star points, using the 5.5" squares. We are using the four squares to make four quarter triangle squares, also known as hourglass blocks. Again, if you are used to another technique, use it, as long as the final pieces are the correct size (4.5" uncut).
Draw a diagonal line from corner to corner on the back of both the background square and the light contrast square.
Pair up the background square and a green square, right sides together, and sew a quarter inch from the center line you drew on the background square. This is key; instead of sewing on the line, this time it is a guide and you sew a quarter inch to the right of the line. Then turn the square and sew again a quarter inch from the other side of the drawn line.
Pair up the light contrast and the other green square and repeat, sewing on each side of the diagonal line you drew on the wrong side of the contrast square.
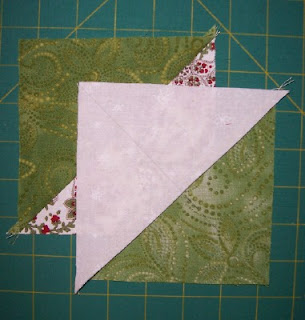
Using scissors or a ruler and rotary cutter, cut along the drawn line; each square will be cut into two right triangles, like this:
Press them open, pressing seams toward the green fabric. You will have four half-triangle squares like this. Two have a triangle of background fabric and two have a triangle of light contrast fabric.
On the squares that have the background fabric, draw a line on the back, from corner to corner, perpendicular to the seam. Pair a background/green square with a contrast/green square, right sides together as shown. Because you pressed the seams toward the green fabric, your seams will butt up against each other at this stage.
You want to be sure the seams butt up tightly, without overlapping or leaving a gap. This will ensure the four points meet in the center of the block. Pin to hold in place.
Sew a quarter inch from the drawn line, on each side of the line, the same as the step above. Cut the squares apart on the drawn line. You will have four pieces again.
Press the seams to one side (does not matter which direction you press). Your four squares should look like this:
Two opposing sides in the green star point fabric, one in the light contrast fabric, and one in the background fabric.
Next, we trim the blocks to size. I use the 4.5" fussy cut ruler from my Quilt In A Day Fussy Cut Rulers, but there are lots of other rulers out there specially for cutting quarter triangle square blocks. You need a ruler that has 90 degree diagonal lines marked on it. Line up the lines on the diagonal seams and cut to 4.5" square.
Here is the trimmed square. So far, it looks just like an hourglass block.
Now for the radical part, the cut that creates the look of the star block. Using a ruler (I am using a 6" square Olfa ruler here), you will trim the block down to 4.5" by 3.5" by trimming from the side with the contrast fabric triangle. Don't trim the background triangle!
You are cutting an inch from one side. (I know some of you are shuddering at the "waste" but this method is much easier than cutting out each shape using templates and then piecing individually. Instead, you get this complicated look using easy techniques.)
You have five pieces of the final block finished; put them on your block board and see how it looks.
(If you want to keep it simple, you can at this point use 3.5" squares of your background fabric for the corners of the block, instead of the pieced corners.)
To piece the corners, lay out the small red squares and the remaining background pieces to form the corners. Sew eight red squares to the ends of the eight background rectangles and four red squares between pairs of background squares. Press toward the red.
Sew the three resulting strips together to form the corner squares. I press these seams open to help keep the piece flat.
Put the block together on your block board. I sew the block together by working in rows across.
I chain piece without cutting the threads between the rows. This keeps everything together in the correct sequence. Press seams toward the star point blocks. This will allow the seams to butt when you put the rows together.
Sew the three rows together and press seams away from the center. You have finished one block!
Now, start again and make another one!
You can change the size of the final block by varying the size of the squares used for the hourglass blocks; a smaller square will yield a smaller final block (you will need to downsize all the other pieces too).


