Showing posts with label decorating. Show all posts

Tuesday, November 26, 2019

Displaying and Storing Quilts

What do you do with all of your finished quilts? 

Here on Main Street, I have them in the usual places.  One on every bed, plus a few more for each bed so they can rotate.


Smaller quilts folded on the backs of chairs, or tossed "casually."  I have a seasonal rotation for these throw size quilts.


I hung two curtain poles on the wall on our second floor landing and use them to hang folded quilts.


I change the assortment here as part of my Christmas decorating.


And I have a quilt holder on the wall in the kitchen.  I got this wooden holder at a quilt show years ago, it is 42" wide, great for a rotating display of smaller quilts.  


And I have a couple of quilts hanging in my sewing room.  The Spools quilt is hanging from a dowel rod ...


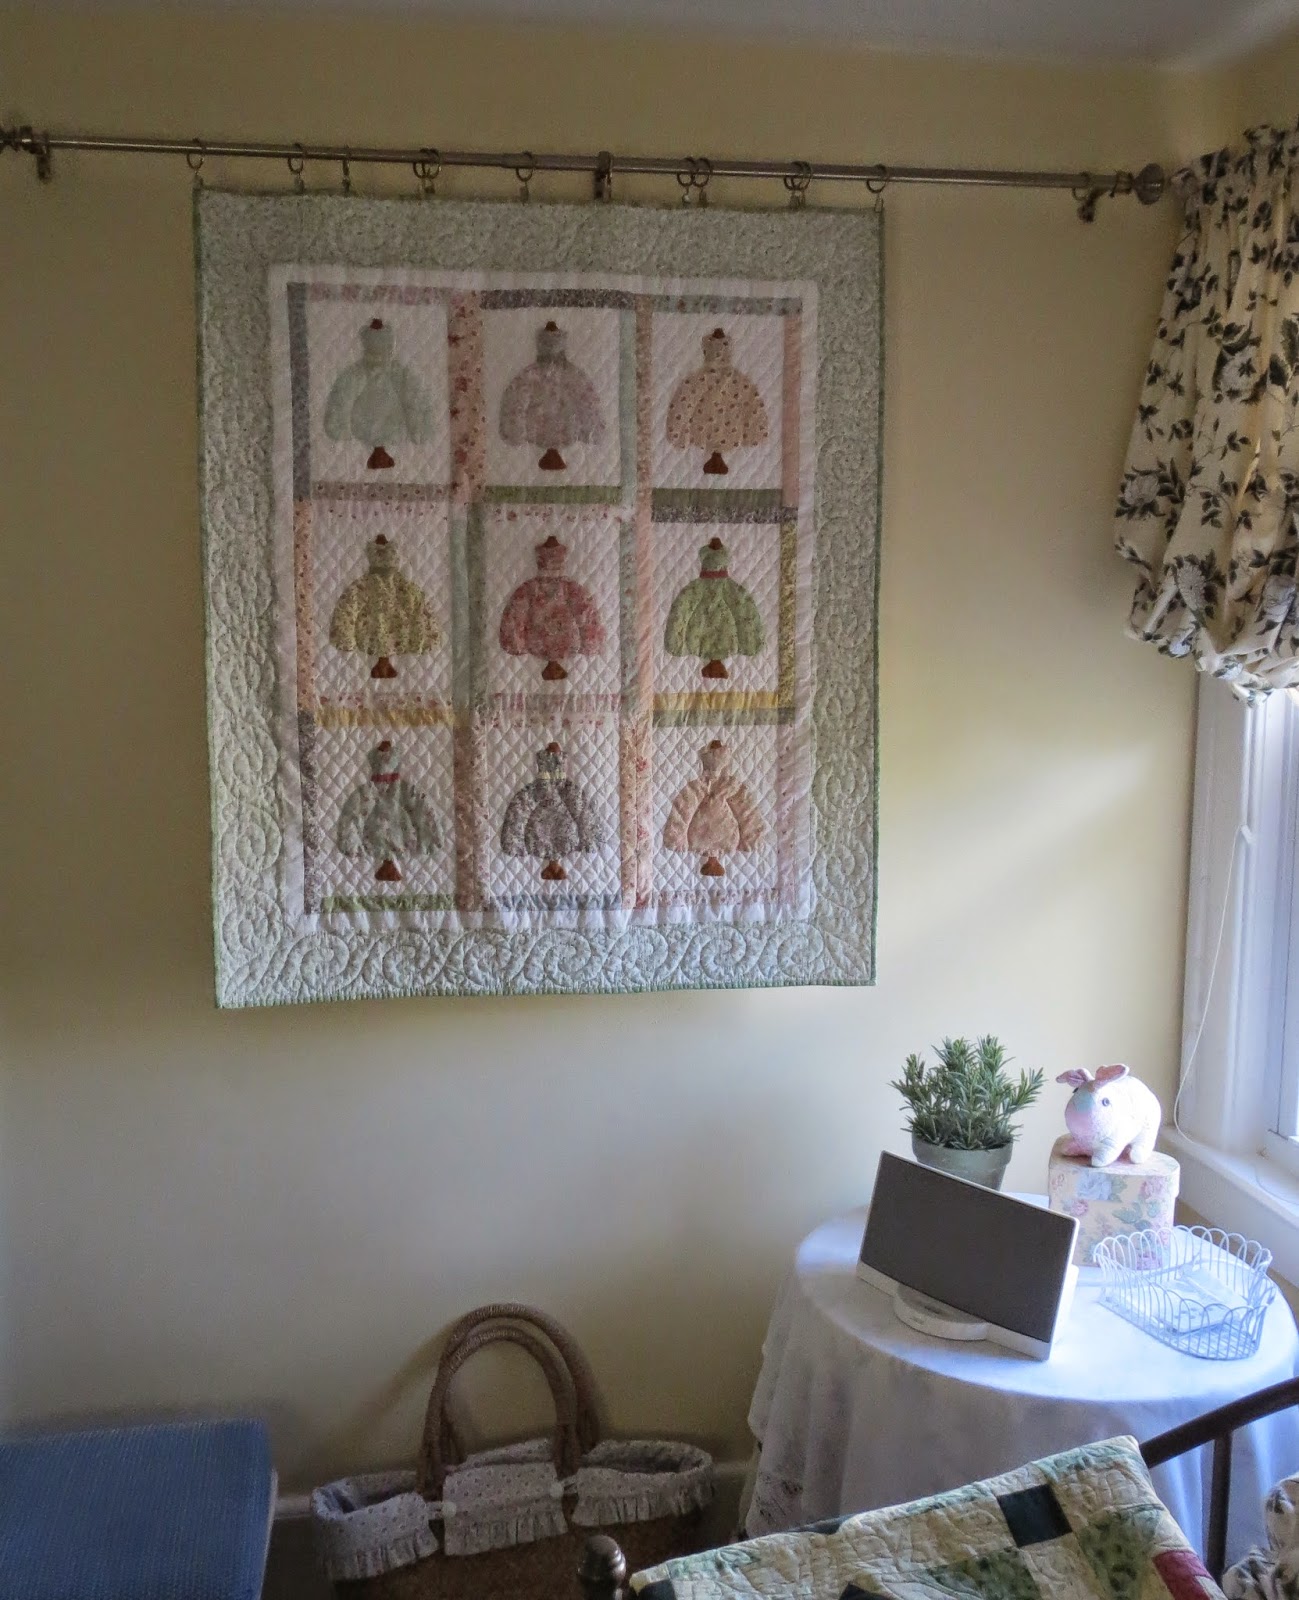
...while Say Yes To The Dress is hung from a curtain rod using clip-on curtain rings.  


 But even with all these quilts on display, I have many more folded and stored away.  So when I saw this basket in Target, I thought it would be great for holding a few rolled up quilts.  I like the look and it holds quite a lot.  I've got three quilts in it (one is twin size and two are large throws) and could squeeze in one more.   


 If you would like to do something similar, the information on the basket from Target is here.  Target doesn't ship this basket, you have to get it in-store, but I saw a similar one at West Elm and they do ship.  That info is here.



 photo signature_zps7mcw44cc.png

Thursday, May 16, 2019

Pillow Shams Inspired By A Table Runner

About 10 years ago, I made pillow shams for our bed out of some floral fabric that pretty much coordinated with all of the quilts I've made for the bed.  But after 10 years of washing and sun exposure, they were worn out.  The fabric had weakened in some areas so much that it was torn and disintegrating.  So new shams were in order. 

I set about making them, with my design inspired by this table runner pattern by "Quilted Cuties" called Hopscotch. The table runner is 16" by 36" and made out of mini charm squares and some background fabric.  I made some modifications to get pillow shams that measure 20" by 26" and used fabric from stash, cut into 2.5" squares.


Here's the end result...


...and the pair of shams on the bed with the quilt I was trying to coordinate with.  I made this quilt about 15 years ago and it's the post-Christmas quilt in the rotation so usually in use roughly January-March. 


This quilt is a "blended" design that used a lot of different fabrics, all in shades of muted pink, rose, green, and pale yellow.  I found two of the prints (the green floral in the center and pink next to it) still in my stash (I must have purchased them at least 15 years ago!) and added a couple of yellow florals that are newer but mix with those in the original quilt very well.  The background is a tiny yellow floral on ivory.


I did the quilting myself, on my domestic machine with the walking foot, quilting in the ditch for a  cross-hatch effect.  It was not difficult as there wasn't the bulk of a regular quilt to wrestle with, and I am pleased with the result.  If you look closely, you can see where my stitching leaped out of the ditch in a few places but I think it turned out quite well. 


These shams don't coordinate well with the other quilts I use on this bed so I will have to come up with at least one more set.  I have some ideas but nothing that has "jelled" yet.  While I mull that over, I'm turning to another small project. 


 photo signature_zps7mcw44cc.png

Wednesday, October 29, 2014

Tour My Sewing Room

Thank you for coming on the house tour.  Would you like to see my sewing room?  Yes, this is where all the quilts you see were made. 

When we agreed to be on the house tour, I thought the historical society was interested only in the first floor of the house.  But then two ladies from the committee came to see the house (to be sure it is not a house of horrors, we joked), saw all the quilts, and thought people would enjoy seeing the bedrooms and sewing room.  "Of course, you'll have to clean up," said one, looking at all the stuff on the sewing room floor (aka my organization system). 


View from the doorway.  Sewing room doubles as a guest room.
There is a trundle bed under the day bed.
 
 
It took some work to get it all cleaned up.  Still, some tubs of fabric and works in progress were stashed in Miss Main Street's off-limits bedroom.

 
Bookshelf storage unit behind me as I sew, holds my quilt book collection, patterns in one drawer, rulers and templates in another.  The lower cabinet on the left holds part of my Christmas fabric stash.
 
Wall to my left while I sew with All Dressed Up on display.  I can put a piece of flannel over the rod and call it a design wall.  To the left of the quilt is the small closet (a downside of old houses is the small closets); it holds more fabric stash. 


My sewing machine, Bernina Q440.


Tools at hand while I sew.  The onyx bowl holds pins.  A small basket, out of picture to the right, holds scraps for leaders and enders.  The Shaker work tray is handy for carrying hand sewing supplies to another room.
 
Thanks for coming.  Now, I need to get back to work on this quilt!


Monday, February 18, 2013

Trying Out My New Camera

Mr. Main Street gave me a new camera for Christmas.  I decided I better practice with it before our vacation so here are a few shots, even though I've made very little additional progress on Many Trips.

The finished portion of the quilt is on the left.  I folded this part and put it on the design wall so I could continue the partial blocks into the upper right and get the fabrics matched up properly.  The right side of the photo shows what will be upper right part of the quilt, laid out but not sewn yet.  After the little pieces are sewn togethr, it shrinks in size. 

 
It took me a good part of Sunday afternoon just to lay out the blocks shown above.  I have to be careful to match the already sewn adjoining blocks, get a good mix of color across the quilt with not too much of one color clumped up in one area, and work with the fat quarters I chose.  The botton right is going to be even trickier as I am running out of fabric selections but it seems a little late to introduce another print into the mix. 
 
I decided that this will be a throw-size quilt, probably ending up about 65" square.  It will go over the arm of this chair, my reading spot in our living room.  These chairs and the window shades are new; they were selected to coordinate with the existing decor in the room.  I used the cloth on the round table to select all the fabrics in my Many Trips quilt. 


By the way, the chairs and window shades came from Calico Home; I had a great experience with them (the chairs are from their line, their workshop made the shades and reupholstered a pair of chairs) and recommend them if you are redecorating.

The roses in the photo were a gift from some friends to Miss Main Street.  This past week, she was in her school's production of Guys and Dolls, the last musical of her high school career.  It is a year of "lasts" and "firsts" for us!


Sunday, September 9, 2012

What A Find!

I guess I could have clled this post, "Storing and Displaying Quilts, Part 3."  I was doing some errands on Saturday and my route took me by a furniture consignment store in Princeton.  I have plans for an update of our living room and dining room so decided to run in and see what was available.  I didn't find anything for the living room or dining room but I did find this:

 
It is a brass quilt rack, designed to hold three quilts.  It was priced at about $80 (with sales tax) so I decided it had to come home with me.  It is perfect for our mostly traditional decorating style.

 
Here it is in the bedroom with some of my quilts...and a view from the top. 

 
Right now, it is in front of a window so I need to do a little rearranging so I can move it out of direct sunlight.  I think I can even squeeze a couple more quilts on it.


Thursday, July 26, 2012

Storing and Displaying Quilts, Part 2

I got a very nice response to my last post about ways to store and display quilts.  Many of the commenters have glass-front cabinets.  Great idea; the perfect way to store quilts yet still be able to see them.  I don't see that solution in my future though, as we don't have space for another piece of furniture.  Mr. Main Street has a very large glassed in cabinet in our family room that he uses to display a very large model sail boat that he inherited from his father, Capt. Jim.  My father-in-law grew up on the far eastern end of the North Fork of Long Island, in a sailing family, and was a professional yachtsman himself.  Jim's uncle made him the model when Jim was a child so it is rather special.  And handy; if there is any flak about how I want to decorate, I can just point to this great hulking cabinet holding the model boat!

I am looking for something I can use in the bedroom.  But in the meantime, I'll show you how I decorate with quilts around our house.  Besides having a quilt (or two) on every bed, I use my quilts in other rooms.

This quilt hanger is on a wall in my kitchen.  It displays a rotating collection of wall hangings, most of which were made specifically fo this space.  The hanger is 42" across. 


I have quilts casually draped on chairs here and there.  This quilt, Saturday Sampler, is on a chair in our family room...


...while Christmas Ribbons goes on the window seat in the living room at Christmas time. 


Then there is "the stack."  We have this odd display shelf in our family room, formed where the chimney to the living room fireplace juts into the family room.  It holds a rather wobbly stack of throws and lap quilts, just in case we need to warm up while watching TV.  Some of you mentioned having quilt ladders to display your collection and I think I could use one in here.  Just need to find a good source.


This display is on the wall on the landing to the second floor.  It is just two white wooden drapery rods (purchased at Pottery Barn Kids) hung one above the other on the wall.  The quilts are folded or draped over the rods.  It makes a nice scene for anyone coming up the stairs.  My goal is to make a few more Christmas quilts so I can turn this into a red, white, and green display at Christmas time.


I love seeing my quilts put to use, even if it is only decorative use!


Thursday, September 22, 2011

Pumpkins For Fabric Lovers

Have you seen the latest issue of Country Living magazine (October 2011)?  See the pumpkins on the cover - the magazine includes directions for making them using fabric.  The crafter photocopied the fabric onto paper then used Modge Podge to adhere the paper to an artificial pumpkin.  (The pumpkins used are sometimes called Funkins and are available in craft stores like Joann's and Michael's.)  They'd make a cool centerpiece.


In other Halloween happenings, remember Cobwebs?   I'm in the process of applying the binding so I can get it on the kitchen wall in time for the brunch party I'm giving on Oct. 2. 


Maybe I should make some pumpkins to match!


Thursday, January 6, 2011

Straight From Pottery Barn - Decorating with Sewing Machines

It's a style first!  I was there before Pottery Barn!  Probably you were too.


Pottery Barn is now selling "an icon of cottage industry," vintage sewing machines as a decorator item.  Makes a great table topper!  And only $199!

And I thought my quilting projects were getting in the way of our home's decor!  Little did I know, these projects are the decor!  Of course, my usual machine is not vintage.  But I have another one that could qualify and my mother has a Brother sewing machine from the mid 50's.  And I know she never uses it to sew (she brings it all to me to do for her).  That Brother is just waiting to become a decorator object!


(far too neat to be a real sewing space) 

Combine with some piles of fabric to make it more authentic.  If you really like this decorating idea, you can get one on eBay for a lot less than $199.  I like this vintage Singer.


What will be next?  Omnigrid rulers as wall art?

Friday, July 23, 2010

Patchwork Fabric Headboard

I saw this idea in Better Homes & Gardens emailed newsletter and thought it was pretty cool.


Directions for making the headboard are here.  It seems pretty easy, and a relatively inexpensive way to change the look of a bedroom.  I'd be interested except I already have a headboard...and a footboard.  But I'm filing this away for possible future use.