Sunday, June 30, 2013

Scrap Basket Sunday - Week 12

Only minor progress on my scrappy project this week - I made a few more of the pieced setting blocks but nothing worth showing really.  This required more cutting so I started on the setting triangles too. 

I've been pretty much making up this design as I go along, no pattern so no directions to follow.  That means I need to figure out the size of all the pieces myself.  That means knowing the formula for calculating the size of side triangles!  That means a visit to my handy reference book, The Quilters Ultimate Visual Guide


This book appears to be out of print, which is unfortunate because I use it all the time.  (Amazon.com has used copies available through third parties.)  Though many quilting reference needs can be met by information on the web these days, it is so handy to have them on the shelf in my sewing room.
 
 
Everything I need to know about setting triangles is right there on page 227.  There is the formula for calculating the size of the square needed to cut both side and corner triangles, as well as handy reference chart.  In case you need it, the formula for side triangles is:
 
 
(finished size of block in inches x 1.414) +1.25"  = size to cut square
 
 
The square is then cut on each diagonal, to yield four setting triangles.  For example, if the finished size of your block is 10", the formula is:
 
 
10" x 1.414 = 14.14" + 1.25" = 15.39" or 15.5"
 
 
Time to go cut some more blocks.  I should have more progress on this quilt to share next week.


Friday, June 28, 2013

I Need Another Project Like I Need A Hole In The Head...

...But I could not resist.


I saw these patterns from The Pattern Basket on the designer's blog and immediately saw possibilities for making both from my stash (mostly).  Sweet Pea is shown in a not yet released Fig Tree fabric collection called Honey Sweet.  I think Milk and Honey is shown in one of the designer's own fabric designs called Blushing from Henry Glass.

I'm not sure when I'll get to either as I have something else lined up for my next project but possible fabric combinations are percolating in my head. 

Monday, June 24, 2013

Scrap Basket Monday?

We were away for a long-weekend get-away and I missed posting for Scrap Basket Sunday so I'll make do with Monday evening.  I did make some progress during the week on my setting squares.  Now I have enough of them to show you what I'm planning with the setting of my Lemoyne stars.

 
The blocks are on point so I will need setting triangles for the edges.  I'm planning to continue the secondary design out further, so the squares extend beyond the stars.  But this will give you an idea of my intent.


Here's a close-up that shows how the design is formed.  From a distance, the small brown squares look like sashing but they are actually made up of four-patch blocks in the corners of the setting squares.   

You may also have noticed that my second-generation design wall is not working as well as the first did.  It is less cumbersome and less of an eyesore, but not quite as functional.  It has a tendency to shed its blocks and that won't do!  I may soon be working on design wall 3.0.

Click over to Kim's blog to see what other scrappers are up to.


Sunday, June 16, 2013

Scrap Basket Sunday - Week 10

I reached a decision on how to put my Lemoyne star blocks together, made a necessary trip to the LQS for supplies, then cut and pieced.


12 done, 24 more to go.  I hope to get them finished this week, then I can start assembling the quilt top.


Click on over to Kim's to see the other Scrap Basket Sunday participants.  And take at look at the video tribute to Dads that she posted; it is so funny!


Bloglovin

Follow my blog with Bloglovin

Some technical stuff going on here while I adopt Bloglovin in place of the soon-to-vanish Google Reader.

Friday, June 14, 2013

Inklingo

I'd like to make a hexie quilt, something like this one from the Fat Quarterly quilt along.  I've tried English paper piecing and am not a big fan.  So I put off starting a hexie project, afraid I'd get into it but never finish - like planning for a UFO.


But I recently discovered something called Inklingo, which might be a good alternative for me.  I discovered Inklingo when, following the trail of a picture I saw on Pinterest,  I ended up at the Inklingo website.

Inklingo sells downloadable shapes to print on fabric.  It reminds me of how I initially learned to quilt, though that was before downloadable anything.  In my first quilting class, we used cardboard window templates to draw both the cutting line and sewing line on the wrong side of fabric, cut out the shapes on the cutting line, then hand sew them together on the sewing line.  It was great fun at the time and I made a few pillows and a wall hanging.  But I was in my mid-twenties, getting started on my career, looking for a husband, buying a condo, volunteering at the library - in short, I had little time to spare for hand sewing and quickly figured that making a bed size quilt this way would involve a lifetime of spare time.  A few years later, I discovered rotary cutting and machine sewing in a class called Quilt In A Day (turned out to be more like a month in my case) and have never looked back.  But the idea of hand sewing has some appeal to me now, not that I have any more spare time than before (though I am no longer husband hunting).  And the Inklingo technique does away with the tiresome drawing around templates step and includes directions for rotary cutting the shapes out after printing on the fabric.


Does anyone have any experience with Inklingo?  Should I give it a go?


Tuesday, June 11, 2013

More Stash Diving

I got a new idea for setting my Lemoyne star blocks.


This one involves a pieced alternate block, not at all what I was originally thinking, so I did another stash dive looking for fabric that matches my "vision" for the new pieced block.  I found a few, nothing exactly what I had in mind.  Oh, too bad, does that mean a trip to the quilt shop?

I may make a test block with what I have on hand, just to check it out before I make a further investment in fabric.  Stay tuned!

Sunday, June 9, 2013

Scrap Basket Sunday - Week 9

I made eight more Lemoyne star blocks this week and figure I am close to having the number I need for my quilt, whatever the setting turns out to be.  So I decided to trim them up.  I'm using the Rapid Fire Lemoyne Star ruler to strip piece my star blocks.  They are meant to be trimmed down to size and end up with uneven, jagged edges.

 
block before trimming


block after trimming


My blocks trim to 7.5" so this 8.5" square ruler is a big help.  I line up the 3.75" lines on both the vertical and horizontal seams through the block, plus the diagonal line on the ruler with the diagonal seam on the block and trim the top and right edges.  Then rotate the block and trim the other sides.  Actually, I rotate my rotating Olfa mat - a huge help, so glad I bought this at a quilt show.  (You may recall one of my earlier posts about what a sucker I am for gadgetry seen at quilt show vendors.)


The yield is some nicely squared up blocks and a pile of trimmings.  This pile represents about 20 blocks. 


Earlier in the week, I went stash diving for fabric that might be used in the setting of these blocks.  I found a few possibilities.  I love this stripe and the color is good match for the star background fabric but I think it may be too delicate looking for this design.


Here are three possibilites.  The fabric on the left is a Fig Tree Designs print; I'm thinking about using it for the backing.  I like the large toile in the center; it is a possibility for setting triangles.  The print on the fabric on the right did not show up in the photo but it is very close to the star background fabric, just a much larger scale. 

 
Setting decisions still to be made!  And more scrappy blocks to be seen at Kim's place.
 

Friday, June 7, 2013

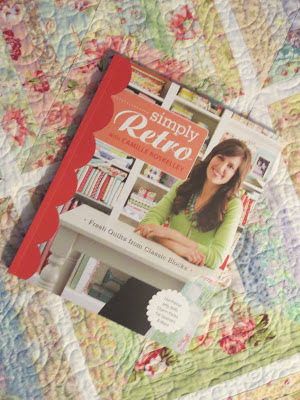
Friday Find - Simply Retro, by Camille Roskelley

Look what came in the mail from Amazon:

 
It is Simply Retro, by Camille Roskelley.  I saw enough online to know there were a few projects I like, making it a good purchase for my quilting library, and after seeing the real deal, I am not disappointed.  All of the projects use classic quilt block designs, but are updated with modern fabric and color choices.  And one of the projects is a baby quilt made from one super-sized block.  All the projects are based on using precuts, like jelly rolls, charm packs, and fat quarters, but can easily be adapted for fabric odds and ends pulled from your stash.
 
My favorites are this cheery number called Swell...

 
...and this over-sized granny square style block called Vintage.


Thursday, June 6, 2013

Globe Trotting - Finished


Back in March, I showed you this flimsy, called Globe Trotting.


Now Globe Trotting is a true finish, quilted and bound.


Karen Thompson did the quilting, using an all-over design of swirling feathers and little circles. I don't usually wash my finished quilts right away but I washed this one to see if washing would remove the little bit of stiffness from the interfacing and it did. 


I bound the quilt using the same raspberry pink solid I used in the blocks. 


And the backing is a Fig Tree Designs print I got on sale. 


Globe Trotting is in place on my reading chair, though with summer here, it will be some months before I need it.

 
Globe Trotting is one my Fig Tree Harvest quilts; all the quilts are on my Fig Tree Harvest page (tab at top of blog) hereMy tutorial for the Many Trips Around the World block can be found here.

Tuesday, June 4, 2013

Design Wall 2.0

Last year, I made my first design wall - two pieces of insulation board from the hardware store covered in batting.  Not much to look at but very useful.

 
But now I have have this rod for quilt display hanging where the design wall was placed.  The clip-on curtain hooks gave me a new idea!
 

What if I hang a piece of flannel from the curtain hooks?  Easy to put away when the room has to revert to guest room...


...and it does the job!

 
I still have the insulation board design wall, stored in the basement, just in case I need it. 


Sunday, June 2, 2013

Scrap Basket Sunday - Week 8

I was too busy to join in Scrap Basket Sunday last week. Instead, I was at Miss Main Street's high school graduation ceremony.  Here she is with her diploma and Mr. Main Street.  (Mr. Main teaches at the same school and the teachers wear academic gowns for the ceremony.)

 
And just a few days prior to graduation, we had this exciting event:  prom!


But now I'm back in the groove, nearing the finish of my scrappy Lemoyne stars project.   


Remember the stars?  I need to make about 10 more but in the meantime, I've been pondering the setting.  I originally planned to do something simple; either alternate star blocks with plain blocks or set the star blocks in vertical rows with wide sashing of the background fabric between the rows and for the borders.  Then I found some fabric in my stash that ignited another idea.

 
What if I set the star blocks on point, in vertical rows with setting triangles from the background fabric, with sashing made from this border stripe from the Lumiere de Noel line by French General? 
 
I have this border stripe in two colors.  The lighter color is a perfect color match for the colors in the  background fabric I used.  At first I thought it would be perfect, then I tried the darker shade and I think that is even better.   


The light shade tends to disappear while the darker one provides contrast without overpowering the stars.  Any opinions?


For more scrappy projects, visit the other Scrap Basket Sunday participants over at Kim's blog.