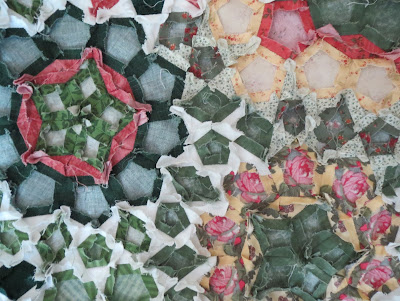
Now that I'm nearly done, and with over a year of experience working on my own
La Passacaglia quilt, I'm here with some tips just in case you want to tackle this project yourself.
First, you need the book
Millefiori Quilts by Willyne Hammerstein. It was published by Quilt Mania and is not widely available in the US (not available on Amazon.com); I got my copy at
Paperpieces.com. Even if you know how to do English paper piecing, you will need the diagrams in the book because this quilt goes together like a jigsaw puzzle.
La Passacaglia is constructed using the English paper piecing method, where fabric is secured around pieces of stiff paper cut to the desired shape and size then hand sewn together. I can't see machine piecing working for this quilt, given how tiny the individual pieces are. I got my paper pieces from Paperpieces.com. They sell a
complete pack for this quilt (as well as other Willyne Hammerstein designs) and while it seems kind of pricey, it will save you a lot of time; I would rather sew than cut pieces of paper! You can either baste the fabric to the paper or use fabric glue. I used glue, the
Sewline glue pen, which is easy to handle and applies a narrow line of glue. You don't want too much glue as it will make it harder to remove the paper at the end. I think I used about seven glue refills for the pen as well.
It is very helpful to do your gluing and some of the cutting on a rotating cutting mat. It makes things easier but is not absolutely necessary. I have this
Olfa mat and have used it for other projects. Don't let the square shape fool you; it does spin.
It is possible to cut your fabric using a regular ruler and rotary cutter but I bought the acrylic templates for each shape from Paperpieces.com along with the papers. I found them particularly useful when fussy cutting. When not fussy cutting my shapes, I cut my fabric in strips the width of each shape then used the acrylic templates to cut the individual pieces.
Of course, you need needles and thread for the hand sewing. In her YouTube tutorial, Sue Daley recommends Bottom Line thread from Superior Threads so I bought the
set of bobbins to give me a wide range of colors. You want your thread to either match the fabric color or blend, so your stitches don't show. I used matching colors where I could and found a khaki color included in the bobbin donut (actually #617 taupe) blended well. Bottom Line thread is polyester; if you don't like using polyester thread, try one of the fine threads like Aurifil or a thread made for hand applique.
You need a size 10 or 11 straw needle for the sewing; I used some I had in my quilting tool box. You will want several needles for the project. The eye of this size needle is small so you may find a needle threader useful. I recommend using a thimble to protect your finger tips. I like the adhesive dots (I put one on the middle finger of my right hand, exactly where a callus would form if I didn't use a thimble), but you can use whatever works for you, which is probably whatever you use when hand finishing binding. I found the small binding clips useful for holding two pieces together before I took the first few stitches as it is hard to get pins through the paper.
There are a number of videos on YouTube that will help teach you the actual stitching. I like
Sue Daley's videos and Paperpieces.com has
some tutorials as well.
Let's not forget the most important part, the fabric! If you Google
la passacaglia quilt and click on
images, you will see this quilt in made in every conceivable color combination. You can see examples on Pinterest and Instagram as well. I had a particular color combination in mind and chose fabrics (mostly from my stash) accordingly. Fussy cutting floral, paisley, and other large patterned prints can give your rosettes a really special look and is worth the time. You will want to augment these prints with small scale prints, tone-on-tones, and stripes for variety.
Here are three fabrics I used in my quilt, fussy cutting each in different ways. When fussy cutting, you will need either five or ten repeats of the same motif (keep this in mind if you are shopping for fabric).
Here's an example of the "swiss cheese" effect after fussy cutting. I used this fabric for the center star (5 diamonds each) in two rosettes and for the outer ring of 10 pentagons in another rosette.
One fabric print can be fussy cut in different ways, emphasizing different parts of the print and different colors, to give a variety of looks.
Go here to see how Lynn Wilder used fussy cutting to great effect in a Lucy Boston block.
Here's a 19th century repro fabric that would be great for fussy cutting. Or say you want to use the French General colors of red, cream, and tan. A wallpaper stripe like
this or
this, along with a motif like
this would get you off to a great start with lots of potential for variety.
If you've been thinking about starting this project, I urge you to go for it! I've found it very satisfying and see myself doing another EPP project in the future. Just allow yourself plenty of time and enjoy the process.


